Everyone can buy a kitchen oven in the store, but not everyone can make it with their own hands. Those who doubt their abilities, want to say: "Do not be afraid." Creating a beautiful kitchen do-it-yourself oven mitts from fabric does not require special skills depending on the complexity, but what a pleasure it is to have such an original thing in your kitchen.
Beautiful do-it-yourself oven mitts made of fabric: features and materials
To make a do-it-yourself tack, you will need the following materials:
- fabrics of two types (for the front and the inside of the tack);
- the filler, as a rule, is batting, synthetic winterizer or an old terry towel folded in several layers;
- scissors, sewing machine, iron.
It will take about half an hour of your time to make an intricate tack in the shape of a mittens or a rectangle, which can not be said for complex models. At the same time, sewing tack can be organized with the children.
Methods for making beautiful do-it-yourself kitchen potholders from fabric
Tack mitten
To make this tack you will need two types of fabric and a filler. Mittens may look different. They can be ordinary, quilted or complicated decor.

First you need to prepare a template for the size of your hand. Put your hand on the paper, draw a contour around the arm with an overlap of 3 to 5 cm. Cut a paper template and cut into it 2 parts from the front fabric, 2 parts from the filler and 2 parts from the fabric that will be inside the tack (in other words, rough fabric )
Now put all the details in layers. Starting from the bottom first layer, lay on the table in the following order: one piece of draft fabric down "face", the next layer is one piece of filler, then the front fabric is immediately two parts with a pattern to each other, then the filler, and then the rough fabric " face up.
Sew the tack along the contour, backing away from the edge of 5 mm., Leaving the edge at the base of the palm unstitched. In order for the resulting tack to remain beautiful after you twist it, you need to make incisions from the edge to the seam, without cutting 1-2mm.

Now you can turn the tack and straighten the edges. The next step is to sew the hem on the glove sleeve. Use a ribbon, cloth, or slanting trim for the trim. If this is fabric, then stitch it with the bend of the edges, if it is inlay, then it is already ready, you just need to fasten it with needles and sew along the edge. If you have chosen a satin ribbon, then you do not need to twist it, just carefully wrap it around the edge, fasten it with needles and sew. Sew a loop on which the mitt will hang, choosing it from the front or fringing fabric.
In order to make the tack a quilted one, before stitching all the details, quilt the front fabric as you would like. It can be rhombuses, squares, rectangles. The direction and frequency of lines is also up to you. This is an element of decoration and does not affect functionality in any way.
Long one-piece pot holders

For sewing you will need 4 types of fabrics of the same quality, preferably cotton, filler, needles or pins. We cut out the details: 2 long oval from fabric of different colors, 1 same part from filler, 4 semi-oval from fabric of different color and 2 semi-oval parts from filler similar to the previous ones, but 2.5 cm longer. Also, cut 2 from the remaining fabric stripes 6 cm wide and square.

The strip is sewn to the semi-ovals along the non-rounded edge. Thus, an oval is obtained, which folds in half across the figure. Repeat such actions with the second remaining semi-oars. You should get two identical figures.

Inside each rolled oval lies a layer of filler that you prepared in advance, and is stitched along the free edge. Now we collect all the details in layers. Starting with the first lowermost layer, put a long oval part of the filler, on it a long oval part of the fabric of the same color, face up. On the opposite edges, lay out the stitched semi-oval blanks and top cover with a long oval part of a different color face down. This is how it should look.

If desired, add a loop made from the prepared square. The loop is inserted inward, with the edges outward so that a seam passes along its edges, and the loop remains inside. This is necessary so that after all stitching and turning the product, the loop will be outside and it can be used.
Sew the product along the edge, leave it un sewn 15 cm. Turn the product through it and iron it. Wrap in the non-stitched edge and sew with your hands a hidden seam or gently stitch on the sewing machine.
Tack "Butterfly"

You will need two kinds of fabric, filler, needles or pins.
Cut out the details from the fabrics according to the following pattern, which clearly shows what color of fabric what to cut.

Decide for yourself which fabric will be on the inside of the tack, and which on the outside. If you want to decorate butterfly wings with patterns or pieces of another fabric or buttons, then it is better to do this before stitching all the parts together.
Now we draw the interior between the wings. It needs to be processed with a cantick first of all. To do this, lay down the details of the wings in layers. First, fabric is placed on the table, which will be inside the tack, filler on it, and on top a piece of facial fabric. Stitch the trim on the inside of the wing. Repeat the same action with the second wing.
Now fold all the layers of the tack, where the first part from the outer fabric will lie on the table “face” down, then the filler, after the part from the inner fabric, and put the half wings on top of their places. Secure all parts with pins or needles so that the product does not crumble. Stitch the hem around the edge of the whole tack. For edging, you can use a slanting trim, a satin ribbon or a long piece of fabric 1.5-2 cm wide.
Beautiful do-it-yourself oven mitts made of fabric: professional tips
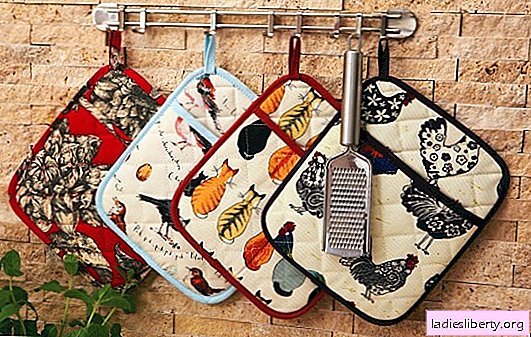
• Grips are always in a prominent place, so keep a few in the house in reserve and change them more often.
• Choose a colorful and non-soiled fabric for the outside of the tack and a cotton that is comfortable for the body on the inside.
• When choosing a synthetic winterizer as a filler, do not forget that it has a low melting threshold and high thermal conductivity. In other words, it will not work for a long time to keep hot objects in tacks with a padding polyester. There is also a risk that, touching a red-hot metal, the synthetic winterizer inside the tack will melt, become thinner and cease to fulfill its function.