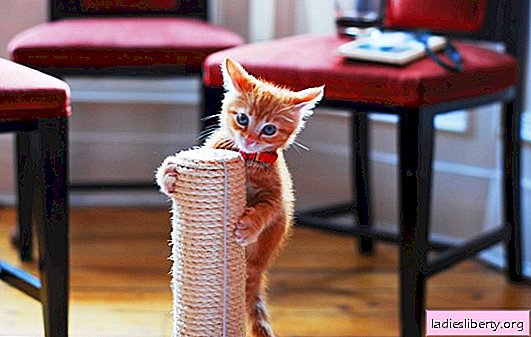
Cats need to sharpen their claws. For this, from her, cat's point of view, upholstered furniture, doorposts and wallpapers are perfectly suitable. But to make repairs in the apartment and update furniture every six months is hardly included in the plans of people living with a cat. A caudate pest can be easily distracted from the selflessly tearing up the sofa by simply switching its attention to an excellent home-made simulator. So, we do a scratching post with our own hands.
To begin with, it is worth mentioning that many completely in vain believe that their tailed pet will not use the clawfish. Why - there is usually no clear explanation. My neighbor’s mother-in-law, the neighbor’s second cousin, once told me ... In general, it’s useless. This is not true. The main reason a cat refuses a claw-claw, even purchased at a pet store, is its improper design. Claws, of course.
Here are the main violations in the design of claw points:
• Height. In nature, cats mainly sharpen claws on trees. The trees are tall. It’s so nice to reach out to full height and sharpen your claws! If the claw point is low, the cat will not use it. Before you make a scratching post with your own hands, you need to consider that it should be slightly higher than the length of the animal. How to find out the length of a cat is easy to figure out.
• Durability of installation. In nature, trees rarely wobble and fall from the fact that the cat sharpens its claws. If a claw-claw bought or made on its own is unstable, the cat will stop using it, again preferring a stable sofa.
• Material. Cats like to sharpen their claws leaving traces. If the material is malleable, the claws in it bind, and it takes some effort to pull them out - the cat will be happy! For this reason, a polished stained oak clawclaw will not impress a cat.
An inexpensive, practical and, most importantly, a solution that suits any cat will be a carpeting claw. Even for those who do not have a carpenter diploma, it is unlikely to take more than an hour to produce it. The budget is about 250 rubles, unless of course you have a buffet in honor of the commissioning. So, do-it-yourself claw-claw from carpet.
We will need:

• A smooth wooden block with a cross section of 8x8, and preferably 10x10 cm, a little longer than a cat. It is better to cut it off in advance, for example in a country house or in a garage. When choosing wood for the manufacture of clawpaws with their own hands, it is better to avoid conifers with a specific smell.
• Top claw point cover. It can be round or square.
• Plywood circle with a diameter of about 70 cm - the lower support of the claw point. For plywood, it is better to take a smooth, polished one with a thickness of at least 20 mm for making DIY claws. Cutting a circle of the required diameter is not difficult with a jigsaw.
• Screws, 6 pieces. The length of the screws is better to choose 45-55 mm.
• Screwdriver.
• A piece of carpet, about 60x45 cm.
• Construction stapler and staples.
• Office knife with interchangeable blades.
• Cat for testing claw points.
The steps of building a claw-claw do-it-yourself:

First you need to find the center of the lower claw point support - the plywood circle, and the center of the bar. Screws will subsequently be screwed into them. Mark them with a pencil so as not to rediscover.

In the found center of the lower support, it is necessary to drill four holes for the screws.

We spread the carpet pile down, and, applying a bar to it, cut off a piece of the necessary height with an office knife.

We put a block on the carpet, and begin to wrap it, attaching a stapler to each side. The carpet should fit snugly against the bar without shifting or forming folds.


After the carpet is fixed, cut off the excess with a clerical knife, if necessary.
The staples after the stapler must be tightly hammered with a hammer, as best as possible. This is done so that the cat does not damage the claws, scratching the claw.

We fix the lower support to the bar with screws. On one of the ends of the bar we put a circle of plywood and, having inserted the screws into the pre-drilled holes, we twist them. Screws need to be tightened to the end, and with a little effort so that the hats of the screws sink into the wood and do not scratch the floor.

In order to prevent the curvature and the screws leaving to the side, the screwdriver must be kept at an angle of 90 degrees with respect to the plywood circle.

Now you need to fix the top decorative cover to the other end of the beam. It is fixed in the same way as the lower support - with screws, into pre-drilled holes.

The upper and lower parts of the claw points can be covered with stain or varnish, but here it must be borne in mind that their unpleasant smell can scare away the caudate.
We call the cat and offer to test the claw point.

After successful commissioning, we go to clean the tools quietly proud of ourselves and the cat.
In general, a do-it-yourself scratching post is not at all difficult. If the tailed wreck is nevertheless nicer than a sofa, you can cheat a little. You can sprinkle a carpet on a clawcloth with a dried pharmacy chamomile or drop one or two drops of valerian on it. After that, the enthusiasm of a cat fanatically scratching a new claw-tip will be comparable only to the enthusiast of an Olympic athlete in training. And the sofa will be forgotten.